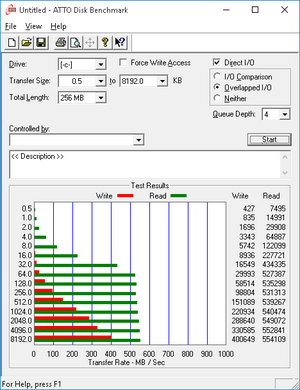
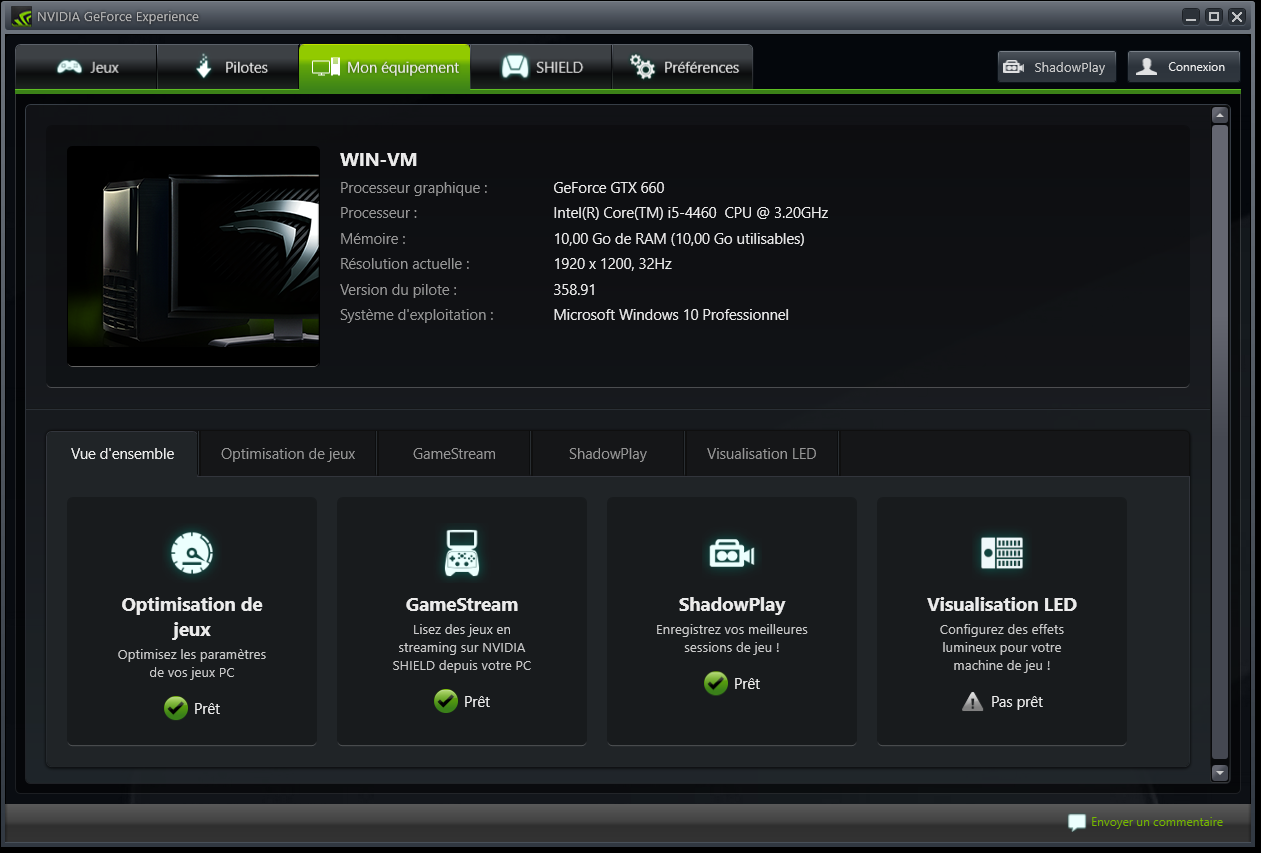
Le but de cette doc est de voir comment on peut utiliser la virtu sous Linux en dédiant une carte graphique à une VM (VGA/PCI passthrough).
→ un processeur supportant le VT-d ;
→ une carte mère supportant également le VT-d ;
→ 2 cartes graphiques. Le chipset graphique intégré aux cores i5/i7 est suffisant pour la partie Linux (voir patch i915 cependant) ;
→ 2 écrans ou un écran avec plusieurs entrées.
Ci-dessous le hardware/software utilisé dans ce guide :
Hardware
| MB | CPU | RAM | GPU | Disk | |
|---|---|---|---|---|---|
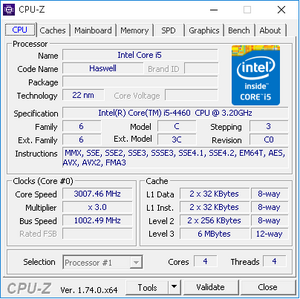
| host | Asus Z97-AR | Core i5-4460 @ 3.20 Ghz | 16 Gb | Radeon R240 | SSD 840 EVO 250G |
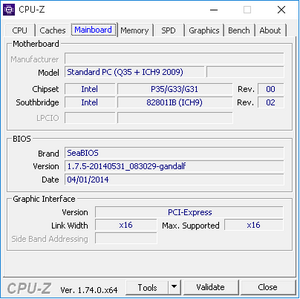
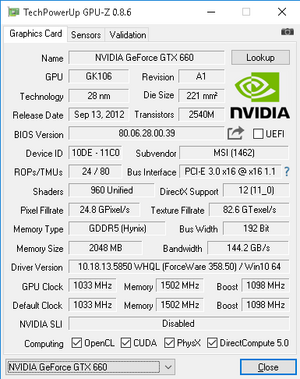
| guest | ICH9 | Core i5-4460 @ 3.20 Ghz | 10 Gb | GTX 660 | LVM |
Software
| OS | Kernel | Virt | Nvidia | Syngergy | |
|---|---|---|---|---|---|
| host | Debian Jessie 8.1 | 3.16.7-ckt11-1+deb8u5 | qemu 2.1.2 | n/a | 1.7.4 (serveur) |
| guest | Windows 10 Pro 64 bits | n/a | n/a | 358.91 | 1.7.4 (client) |
Voir les liens ci-dessous pour l'install du patch :
Si vous utilisez une carte graphique dédiée pour le host, pas besoin de ce patch.
Install et config de qemu
apt-get install qemu seabios
Pour avoir une version plus récente de qemu (2.6.2) : qemu_2.6.2-1_amd64.deb - package pas encore testé.
- Récupérer Synergy ici (https://synergy-project.org/nightly) et l'installer
- Modifier le fichier /etc/default/grub :
GRUB_CMDLINE_LINUX_DEFAULT="quiet intel_iommu=on vfio_iommu_type1.allow_unsafe_interrupts=1"
- Mise à jour de grub :
update-grub
- Modifier le fichier /etc/modules :
# /etc/modules: kernel modules to load at boot time.
#
# This file contains the names of kernel modules that should be loaded
# at boot time, one per line. Lines beginning with "#" are ignored.

pci_stub
vfio
vfio_iommu_type1
vfio_pci
kvm
kvm_intel
cat /etc/modprobe.d/blacklist.conf
blacklist nouveau
- On détecte ensuite les IDs du GPU nvidia :
root@ben-pc:~# lspci -nn | grep NVIDIA
01:00.0 VGA compatible controller [0300]: NVIDIA Corporation GK106 [GeForce GTX 660] [10de:11c0] (rev a1)
01:00.1 Audio device [0403]: NVIDIA Corporation GK106 HDMI Audio Controller [10de:0e0b] (rev a1)
root@ben-pc:~# lspci -n |egrep "01.00.[0-1]"
01:00.0 0300: 10de:11c0 (rev a1)
01:00.1 0403: 10de:0e0b (rev a1)
- Modifier le fichier /etc/initramfs-tools/modules :
pci_stub ids=10de:11c0,10de:0e0b
- Mise à jour de l'initrd :
update-initramfs -k all -u
- Créer le fichier /etc/vfio-pci1.cfg :
0000:01:00.0
0000:01:00.1
- Créer un bridge réseau :
apt-get install remove network-manager
- Modifier le fichier /etc/interfaces :
auto lo
iface lo inet loopback

iface eth0 inet manual

auto br0
iface br0 inet dhcp
	bridge_ports eth0
- Rebooter
- Checker que les devices en question ont bien été pris en compte :
root@ben-pc:~# dmesg | grep pci-stub
[    1.483508] pci-stub: add 10DE:11C0 sub=FFFFFFFF:FFFFFFFF cls=00000000/00000000
[    1.483517] pci-stub 0000:01:00.0: claimed by stub
[    1.483522] pci-stub: add 10DE:0E0B sub=FFFFFFFF:FFFFFFFF cls=00000000/00000000
[    1.483526] pci-stub 0000:01:00.1: claimed by stub
/etc/synergy.conf
section: screens
	win-vm:
		halfDuplexCapsLock = false
		halfDuplexNumLock = false
		halfDuplexScrollLock = false
		xtestIsXineramaUnaware = false
		switchCorners = none
		switchCornerSize = 0
	ben-pc:
		halfDuplexCapsLock = false
		halfDuplexNumLock = false
		halfDuplexScrollLock = false
		xtestIsXineramaUnaware = false
		switchCorners = none
		switchCornerSize = 0
end

section: aliases
end

section: links
	win-vm:
		left = ben-pc
	ben-pc:
		right = win-vm
end

section: options
	relativeMouseMoves = false
	screenSaverSync = false
	win32KeepForeground = false
	switchCorners = none
	switchCornerSize = 0
	mousebutton(6) = keystroke(WWWBack) ;
	mousebutton(7) = keystroke(WWWForward) ;
end
Config de la VM
Il faut récupérer les drivers virtio pour windows ici : https://fedorapeople.org/groups/virt/virtio-win/direct-downloads/stable-virtio/virtio-win.iso (meilleures perfs qu'en IDE ou SCSI). Lors de l'install de Windows il faudra aller chercher ces drivers spécifiques pour accéder aux disques.
Ici LVM est utilisé pour créer les disques de la VM :
  lv_jeux2     datavg  -wi-ao---- 100.00g
  lv_jeux      vmvg    -wi-ao---- 120.00g
  lv_win10     vmvg    -wi-ao----  30.00g
Lors du premier lancement (pour l'install) on ne dispose pas encore de la souris ni du clavier. On lance tout simplement qemu en mode fenêtré, cf. ligne :
win10_install.sh
#!/bin/bash

configfile=/etc/vfio-pci1.cfg

vfiobind() {
    dev="$1"
        vendor=$(cat /sys/bus/pci/devices/$dev/vendor)
        device=$(cat /sys/bus/pci/devices/$dev/device)
        if [ -e /sys/bus/pci/devices/$dev/driver ]; then
                echo $dev > /sys/bus/pci/devices/$dev/driver/unbind
        fi
        echo $vendor $device > /sys/bus/pci/drivers/vfio-pci/new_id

}

modprobe vfio-pci

cat $configfile | while read line;do
    echo $line | grep ^# >/dev/null 2>&1 && continue
        vfiobind $line
done

qemu-system-x86_64 -enable-kvm -M q35 -m 10240 -cpu host \
-smp 4,sockets=1,cores=4,threads=1 \
-bios /usr/share/seabios/bios.bin -vga cirrus \
-net nic -net tap \
-device ioh3420,bus=pcie.0,addr=1c.0,multifunction=on,port=1,chassis=1,id=root.1 \
-drive file=/dev/vmvg/lv_win10,if=none,id=drive-virtio-disk0,format=raw \
-device virtio-blk-pci,scsi=off,addr=0x7,drive=drive-virtio-disk0,id=virtio-disk0,bootindex=1 \
-drive file=/home/ben/nas/softs/Windows10_pro.iso,id=isocd -device ide-cd,bus=ide.1,drive=isocd \
-drive file=/home/ben/nas/softs/virtio-win.iso,id=isocd2 -device ide-cd,bus=ide.2,drive=isocd2 \
-boot menu=on

exit 0
Une fois l'install ok, on binde la carte graphique, on désactive le mode fenêtré et on ajoute les disques que l'on souhaite :
win10.sh
#!/bin/bash

configfile=/etc/vfio-pci1.cfg

vfiobind() {
    dev="$1"
        vendor=$(cat /sys/bus/pci/devices/$dev/vendor)
        device=$(cat /sys/bus/pci/devices/$dev/device)
        if [ -e /sys/bus/pci/devices/$dev/driver ]; then
                echo $dev > /sys/bus/pci/devices/$dev/driver/unbind
        fi
        echo $vendor $device > /sys/bus/pci/drivers/vfio-pci/new_id

}

modprobe vfio-pci

cat $configfile | while read line;do
    echo $line | grep ^# >/dev/null 2>&1 && continue
        vfiobind $line
done

echo "Starting Synergy"
synergys --daemon --config /etc/synergy.conf

echo "Starting Samba"
/etc/init.d/samba start
echo

echo "Starting VM ..."
qemu-system-x86_64 -enable-kvm -M q35 -m 10240 -cpu host,kvm=off,hv-time=off,hv-relaxed=off,hv-vapic=off \
-rtc base=localtime \
-smp 4,sockets=1,cores=4,threads=1 \
-bios /usr/share/seabios/bios.bin -vga none \
-nographic \
-net nic -net tap \
-device ioh3420,bus=pcie.0,addr=1c.0,multifunction=on,port=1,chassis=1,id=root.1 \
-device vfio-pci,host=01:00.0,bus=root.1,addr=00.0,multifunction=on,x-vga=on \
-drive file=/dev/vmvg/lv_win10,if=none,cache=directsync,aio=native,id=drive-virtio-disk0,format=raw \
-device virtio-blk-pci,scsi=off,addr=0x7,drive=drive-virtio-disk0,id=virtio-disk0,bootindex=1 \
-drive file=/dev/vmvg/lv_jeux,if=none,cache=directsync,aio=native,id=drive-virtio-disk1,format=raw \
-device virtio-blk-pci,scsi=off,addr=0x8,drive=drive-virtio-disk1,id=virtio-disk1,x-data-plane=on \
-drive file=/dev/datavg/lv_jeux2,if=none,cache=directsync,aio=native,id=drive-virtio-disk2,format=raw \
-device virtio-blk-pci,scsi=off,addr=0x9,drive=drive-virtio-disk2,id=virtio-disk2,x-data-plane=on \
-drive file=/home/ben/nas/softs/Windows10_pro.iso,id=isocd -device ide-cd,bus=ide.1,drive=isocd \
-drive file=/home/ben/nas/softs/virtio-win.iso,id=isocd2 -device ide-cd,bus=ide.2,drive=isocd2 \
-soundhw hda \
-boot menu=on

echo "Closing VM ..."
echo
echo "VM closed"

echo "Stopping Synergy"
killall synergys

echo "Stopping Samba"
/etc/init.d/samba stop

exit 0
- Une fois l'install de Windows terminée, il faut installer le client Synergy sur le guest pour accéder à la souris et au clavier.
On peut aussi faire du passthrough sur des devices usb :
-device nec-usb-xhci \
-device usb-host,vendorid=0x413c,productid=0x2105 \
-device usb-host,vendorid=0x046d,productid=0xc01e
Backup de la VM
dd if=/dev/vmvg/lv_win10 bs=64k conv=sync of=${LOCAL_PATH}/lv_win.10img bs=64k

kpartx -a /dev/vmvg/lv_jeux
sleep 5
mount /dev/mapper/vmvg-lv_jeux1 /mnt -o ro
rsync -aur --delete --progress --exclude="pagefile.sys" /mnt/ ${LOCAL_PATH}/lv_jeux/
umount /mnt
sleep 5
kpartx -d /dev/vmvg/lv_jeux

kpartx -a /dev/datavg/lv_jeux2
sleep 5
mount /dev/mapper/datavg-lv_jeux2p1 /mnt -o ro
rsync -aur --delete --progress  /mnt/ ${LOCAL_PATH}/lv_jeux2/
umount /mnt
sleep 5
kpartx -d /dev/datavg/lv_jeux2
Infos VM
A tester
QEMU_PA_SAMPLES=6144 QEMU_AUDIO_DRV=pa \
qemu-system-x86_64 -enable-kvm -m 8192 -cpu host,kvm=off \
-smp 4,sockets=1,cores=4,threads=1 \
-machine q35,accel=kvm \
-soundhw hda \
-device ioh3420,bus=pcie.0,addr=1c.0,multifunction=on,port=1,chassis=1,id=root.1 \
-device vfio-pci,host=$DEVICE1,bus=root.1,addr=00.0,multifunction=on,x-vga=on \
-device vfio-pci,host=$DEVICE2,bus=root.1,addr=00.1 \
-vga none \
-bios /usr/share/seabios/bios.bin \
-device virtio-net-pci,netdev=user.0,mac=52:54:00:03:02:01 \
-netdev user,id=user.0 \
-drive file=win7-x64_system.qcow2,if=none,id=drive-virtio-disk0,format=qcow2 \
-device virtio-blk-pci,scsi=off,addr=0x7,drive=drive-virtio-disk0,id=virtio-disk0,bootindex=1 \
-drive file=win7-games.qcow2,if=none,id=drive-virtio-disk1,format=qcow2 \
-device virtio-blk-pci,scsi=off,addr=0x8,drive=drive-virtio-disk1,id=virtio-disk1 \
-rtc base=localtime,driftfix=slew \
-device qxl \
-device usb-kbd \
-usbdevice host:1e7d:2d51
